Step 1: Create Your Own Git Repository
In Module 2, you learned how to create a repository from a template. The Practicum AI team created the repository and set it as a template for you to create your own copy easily. In this exercise, we want to start from scratch, with you creating your own repository on GitHub. For this exercise, you will start a repository for keeping information on your AI journey.
We will start by creating a repo (repository is a really long word…let’s call it a repo from now on 😉). While there are many ways to create a repo, one of the easiest is on the GitHub.com site.
- Navigate to https://github.com/ and log in if needed.
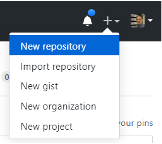
- To create a new repository, click the New button on the left or the +-Dropdown menu on the right in the top menu bar and select “New repository.”
- Using the image below as a guide:
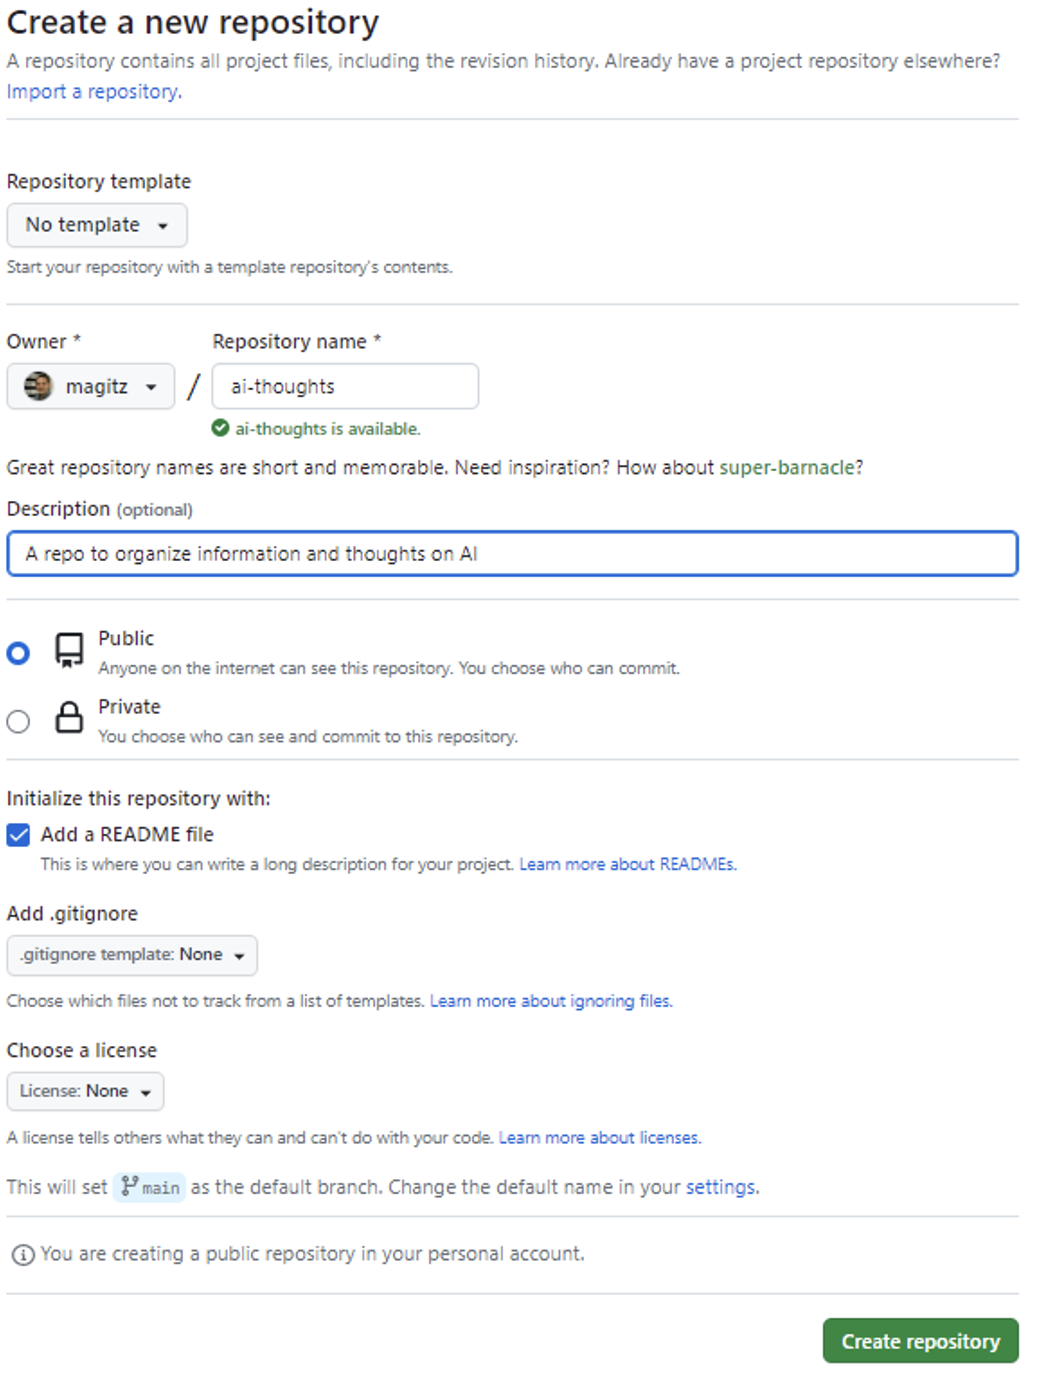
- Select the Owner if needed.
- Repository name can be just about whatever you want; for this exercise, we suggest ai-thoughts.
- Description: Add a brief description of what this repo will be used for. This can always be edited later, but something like “A repo to organize information and thoughts on AI.”
- Public or Private: Sharing a Public repository is much simpler than sharing a Private one (you can share Public repositories with just the site link). Consider keeping the repository Public (the GitHub default setting) unless the repository needs to be private.
- Check the “Add a README file” checkbox.
-
Click the “Create Repository” button.
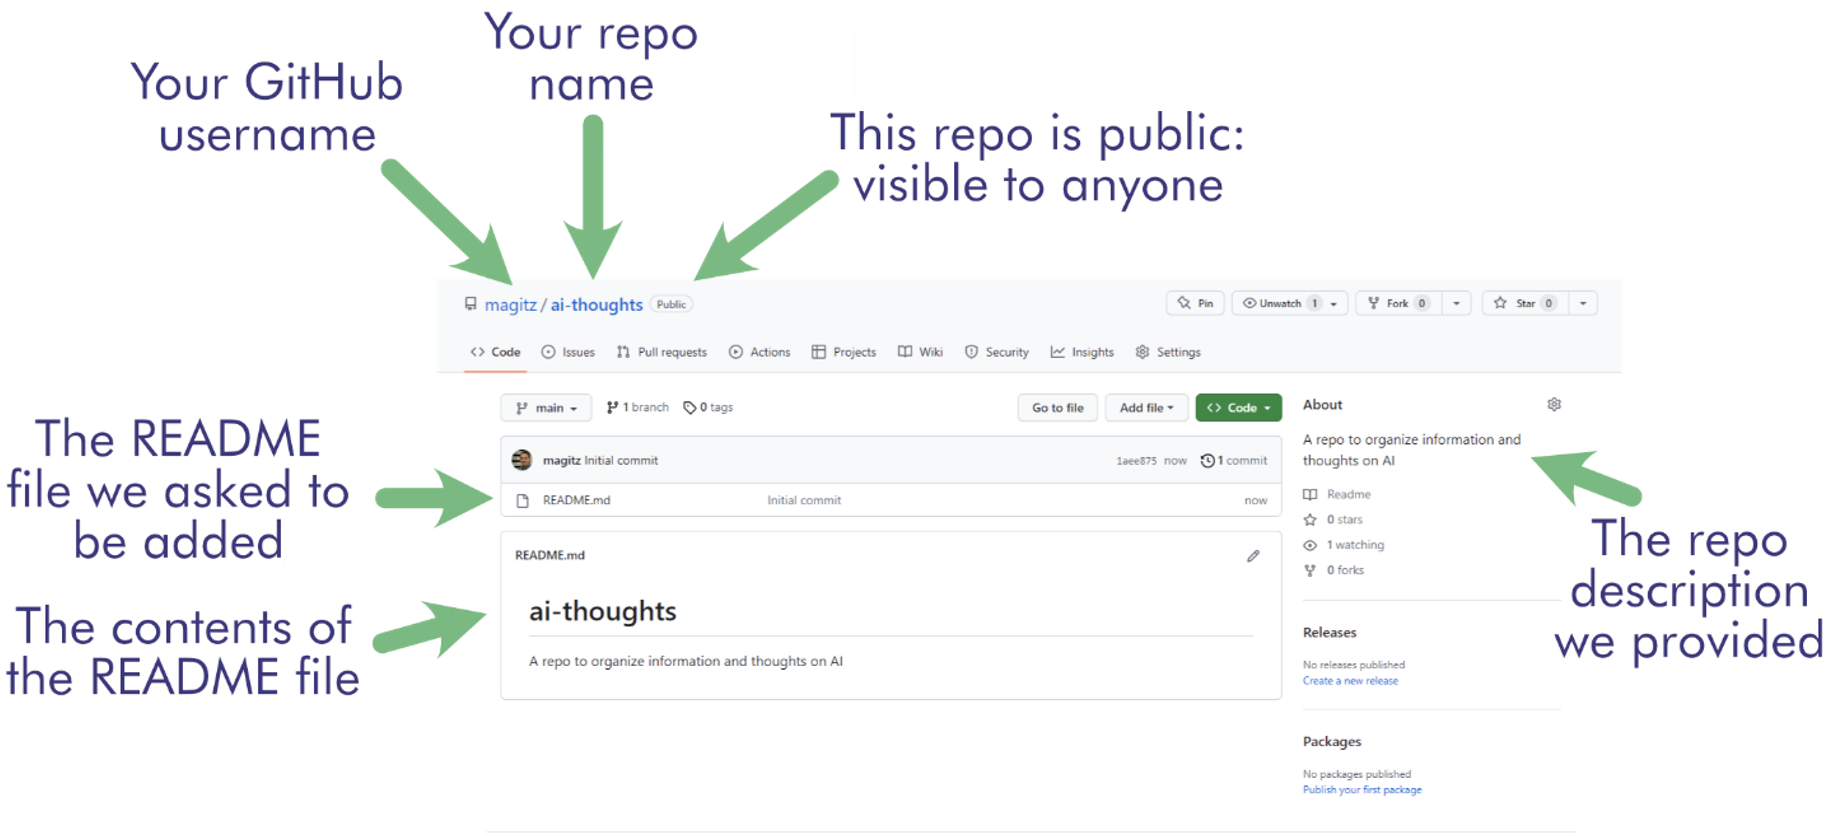
- Explore the layout of the GitHub repo page. There is lots of information, and we will look at more details later, but notice a few things:
- The top bar has linked information about the repo owner and name. It also shows if the repo is public (open to anyone to view) or private (limited to certain users).
- Because we checked the “Add a README file” checkbox, the repo has a file called README.md, and its contents are displayed. Any guesses on what the “.md” file extension is?
- The “.md” file extension means the file is a Markdown file. Yes, the same Markdown that we learned a little about in Jupyter Markdown cells in Module 2.
- Every repo should have a README.md file describing what the repo is for.
- The rendered version of the Markdown will be displayed below the file list on the repo’s site. This is a helpful way to let people know what they should expect to find in your repo!
- We will return to this repo later, but first, we need to set up your GitHub account to work with the system you are using.
Return to the Module 3 page to continue with the next step.
