Watch
 Video: Launch notebooks on HiPerGator
Use HiPerGator to Launch Jupyter and Open a Notebook
Using HiPerGator requires that you have a HiPerGator account.
A HiPerGator account is not provided as part of the Practicum AI courses via Professional and Workforce Development.
If you have an account, you will want to ensure you are part of a group with access to at least 2 NCUs, 1 GPU, and 1 TB of Blue storage. Details of these resources are reviewed in the HiPerGator New User Account trainingLinks to an external site..
Launching a Jupyter Notebook session on HiPerGator involves specifying the resources that your session will use. As outlined in the account training, the HiPerGator scheduler needs information on four key elements:
- How many CPUs do you want: For the Practicum AI trainings, 2 should be sufficient.
- How much memory do you want: For the Practicum AI trainings, 15GB should be sufficient.
- How many GPUs do you want: For the Practicum AI trainings, 1 should be sufficient.
- How long do you want the resources: For the Practicum AI trainings, 2 hours should be sufficient for most exercises.
We will use the Open OnDemand (OOD) web interface to launch and connect to Jupyter sessions. OOD provides an easy interface to provide the resource request, submit the job to the scheduler, and connect to the Jupyter server once it starts.
Steps to launch a Jupyter Notebook session
-
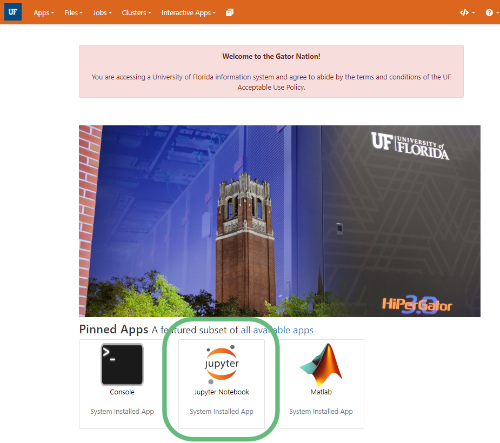
Once you have a HiPerGator account, log in at: https://ood.rc.ufl.edu/
-
Click on the Jupyter Notebook App card on the main page of OOD. Alternatively, you can use the Interactive Apps menu, scroll all the way to the bottom, and select Jupyter Notebook.
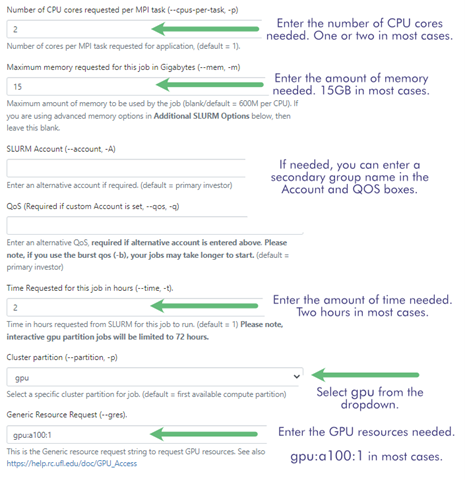
- The next screen allows you to request resources to run a job on HiPerGator.
- See the image for reference, but the suggested resource request for most of the Practicum AI courses is:
- Number of CPUs: 1 or 2
- Maximum Memory: 15GB
- SLURM Account and QOS: Group name as needed.
- Time Requested: 2
- Cluster Partition: gpu
- Generic Resource Request: gpu:a100:1
Note that a GPU is not really needed for this course. You could use the default partition and leave the Generic Resource Request box empty.
- After entering the information, click the Launch button

- On the next page, your job will have a card. The card will start with a light blue border with “Queued” in the upper right. That means your job has been submitted to the scheduler and is waiting for the scheduler to find resources (or is waiting for resources to become available in your group’s allocation). Once the resources are available, the card will change to a dark blue border with “Starting”. Finally, when your job is ready, the card will have a green border saying “Running” and a button to click to “Connect to Jupyter”.
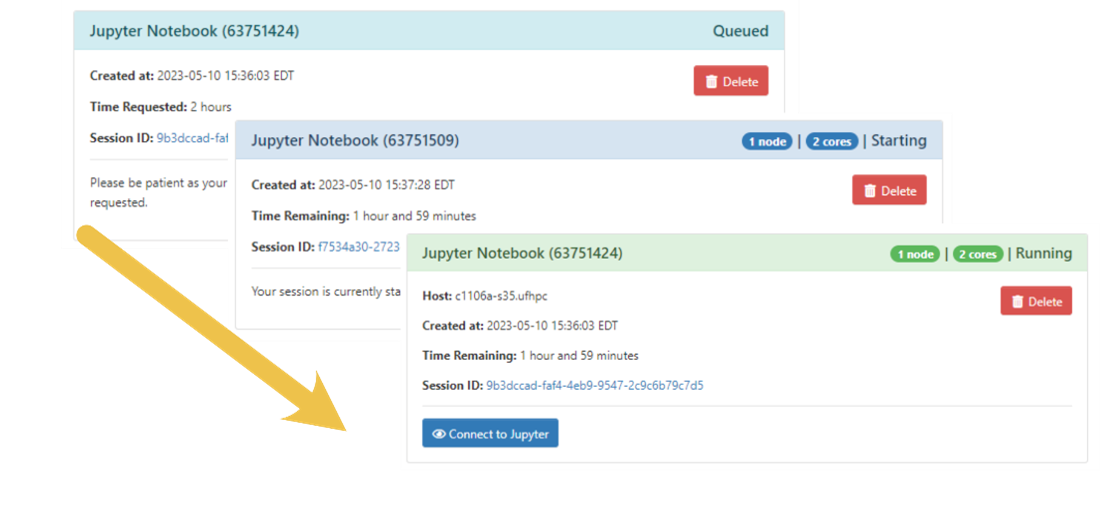
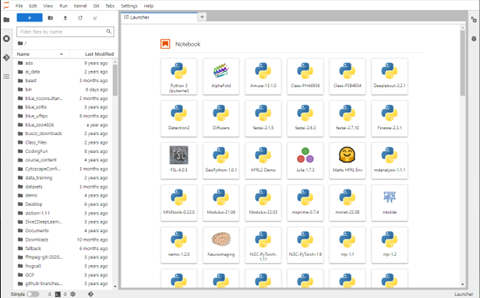
- Clicking the “Connect to Jupyter” button will open a new tab and should open with a window like what is pictured below—on future connections, it will normally open with the documents you had opened last time.
Step 3: Cloning your repository onto the HPC system
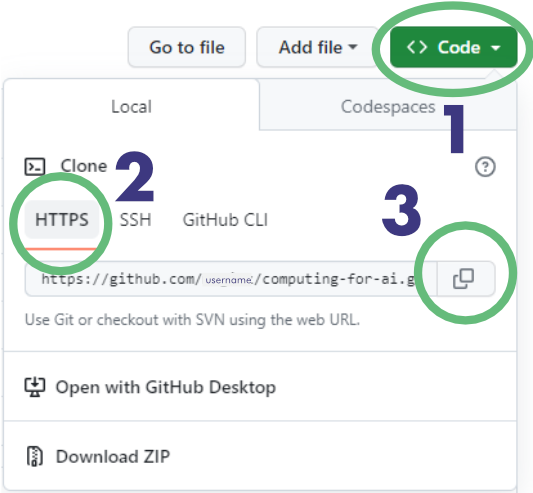
- In a different tab, go to your GitHub repository for this course. It should be at GitHub.com, then your GitHub username, then the repository name you provided, e.g., “computing-for-ai”.
- Click on the following three buttons: 1. The Green <> Code button; 2. The HTTPS button; 3. The copy button to copy the URL. See the image for reference.
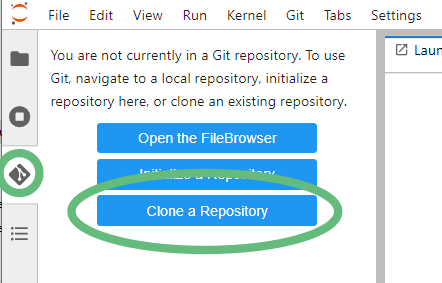
- Return to your Jupyter tab and click the Git tab on the far left of the Jupyter screen (3rd one down), then Clone a Repository button.
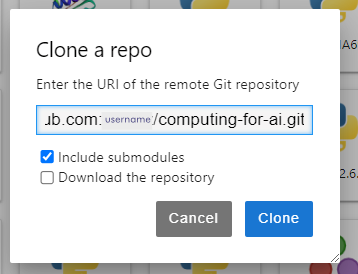
- Paste the URL you copied from your GitHub repository above in the pop-up window.
- Click back on the File Browser tab (top tab on the left under the Jupyter logo). You should now have a folder with the name of your repository (computing-for-ai). Double-click to open that folder.
- Open the 01_intro_to_jupyter.ipynb notebook.
- Read through the notebook and follow the exercises.
